Snowflake
Configuration
For Qarbine to access Snowflake the following information is to be considered:
- account,
- warehouse (optional),
- database (optional) and
- authentication value(s).
Determining Snowflake Account
Sign on to your Snowflake account at app.snowflake.com.
In the lower left corner of the console click your name and navigate to the highlighted option shown below.

Copy the value from the line shown below.


Paste it into a temporary location. It will be used as the Qarbine server template.
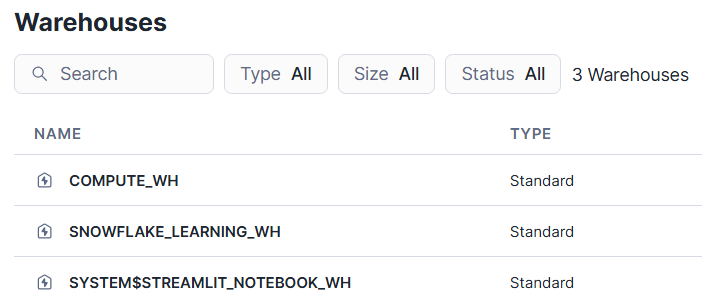
Listing Warehouses
To view warehouses navigate using the option highlighted below.

A sample set is shown below.
Listing Databases
Navigate using the option highlighted below.

Setting the default database context is optional as is the default schema context..
Authentication
There are several ways to authenticate into Snowflake. A common one is a user and password pair.
One alternative is an API token. For details see the following page..
https://docs.snowflake.com/en/developer-guide/node-js/nodejs-driver-options#authentication-options
The following page provides details on the many programmatic authentication options.
https://docs.snowflake.com/en/developer-guide/node-js/nodejs-driver-options#required-connection-options
Creating a User (Optional)
Navigate using the option highlighted below.

In the upper right click the left hand button below.

Fill in the fields

and the password ones

Uncheck

Click

This user and password may be used in the Qarbine server options.
Creating an API Token (Optional)
In the lower left corner of the console click your name and navigate to the highlighted option shown below.

Click

Click the right hand button shown below.

Enter a name

Adjust the expiration.
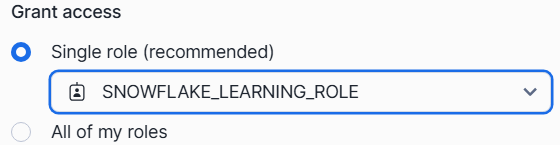
Choose access..
Click

Click the blue button
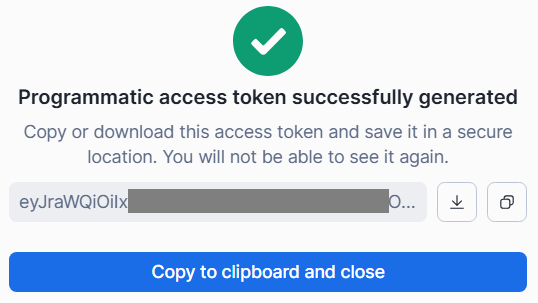
Paste the value into a temporary location. It will be used as the token option in the Qarbine server options.
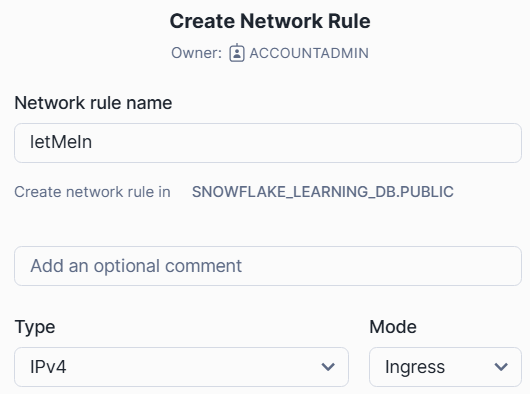
Review and adjust the network policy per

Access to these settings is via the highlighted option below.

For details see https://docs.snowflake.com/en/user-guide/network-policies
Here is a rule that can be used for testing purposes.
Remember to activate any just created rule.

Qarbine Configuration
Compute Node Preparation
Determine which compute node service endpoint you want to run this data access from. That URL will go into the Data Service’s Compute URL field. Its form is “https://domain:port/dispatch”. A sample is shown below.

The port number corresponds to a named service endpoint configured on the given target host. For example, the primary compute node usually is set to have a ‘main’ service. That service’s configuration is defined in the ˜./qarbine.service/config/service.main.json file. Inside that file the following driver entry is required
"drivers" :[
 . . .
"./driver/snowflakeDriver.js"
]
The relevant configuration file name for non primary (main) Qarbine compute nodes is service.NAME.json. Remember to have well formed JSON syntax or a startup error is likely to occur. If you end up adding that entry then restart the service via the general command line syntax
pm2 restart <service>
For example,
pm2 restart main
or simply
pm2 restart all
Data Service Definition
Open the Administration Tool.
Navigate to the Data Services tab.

A data service defines on what compute node a query will run by default along with the means to reach to target data. The latter includes which native driver to use along with settings corresponding to that driver. Multiple Data Sources can reference a single Data Service. The details of any one Data Service are thus maintained in one spot and not spread out all over the place in each Data Source. The latter is a maintenance and support nightmare.
To begin adding a data service click

On the right hand side enter a name and optionally a description.

Set the Compute URL field based on the identified compute node above. Its form is “https://domain:port/dispatch”. A sample is shown below.

Also choose the driver.

The server template is your Snowflake account.

The server options can be a variety of parameters is CSV “key = value” notation. Here is a simple example to provide authentication using a username and password.

A complete set of options which can be set using the server options can be found at.
https://docs.snowflake.com/en/developer-guide/node-js/nodejs-driver-options#required-connection-options
Besides setting a database context using the other entry field, you can also set a schema and/or warehouse context using the server options.
schema = 'TPCH_SF1',
warehouse = 'DEMO_WH'
You can specify both database and schema as part of your connection configuration.
database: Sets the default database context for the connection.
If you would like to use a token to authenticate then this would be included.
token = 'abcdefghijklmnop1234567890',
authenticator = 'OAUTH'
The logLevel can be one of OFF, ERROR, WARNING, INFO, DEBUG, or TRACE. The default is ‘OFF’. The messages will appear in the regular Qarbine log files within the ˜/.pm2/log folder.
logLevel = 'ERROR',
Optionally specify a default database

This sets the execution context. With a database specified this query is OK.
SELECT * from information_schema.TABLES
If a database is not specified then the query must fully qualify the table
SELECT * from SNOWFLAKE_SAMPLE_DATA.information_schema.TABLES
Additional information on the database and schema qualifying is in the Qarbine Snowflake Querying guide.
Troubleshooting
For connectivity issues it is recommended to review the following information.
https://docs.snowflake.com/en/developer-guide/node-js/nodejs-driver-connect#verifying-the-network-connection-to-snowflake-with-snowcd